
Recessed lighting is a chic, modern alternative to traditional light fixtures. With a wide variety of housing and trim options to choose from, recessed lighting can meet almost any lighting need in your home. It can serve as the main light source in the living room, and as spot lighting over work areas in the kitchen. It works for accent lighting, ambient lighting, and wall-washing. Because recessed lighting is set into the ceiling, it does require some extra space up above to work with; the ideal set-up is an attic above the installation site. However, housing options do exist for tight spaces, such as apartments or multi-floor homes, although installing these can get a little trickier.
Part 1: What to Know Before You Shop
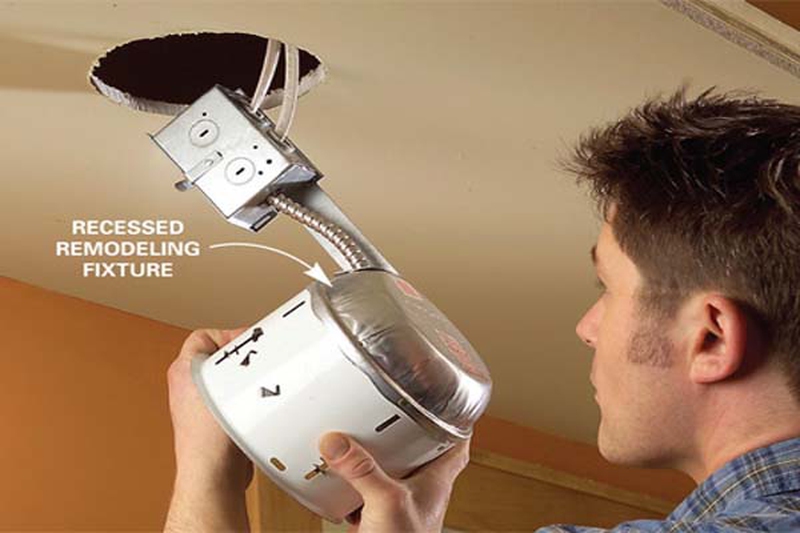
The fixture you choose depends a lot on where it’s being installed. There are two basic types: “new construction” and “remodel.” Use a new construction option if you have access to the space above the ceiling, such as an attic. Use a remodel if you don’t have access to the space above. For example, if you’re installing into a ceiling between stories. The housing on remodel fixtures is typically more compact for fitting into these areas. The next consideration is whether or not the fixture housing will be exposed to insulation. If there is insulation within 3 inches of the housing, choose an insulation contact (IC) rated fixture.
There are lots of different trim options, with some designed for looks and others for function. The trim is the part of the fixture visible from below, which surrounds the light bulb. A baffler trim is the most common. It has grooves which reduce glare, and is best for general lighting. A reflector trim is smooth, polished, and metallic, and (as its name implies) reflects light to make it more intense. These work well in kitchens. Adjustable, or “eyeball” trim, allows you to pivot the bulb in a chosen direction, making it ideal for spot or accent lighting.
Part 2: Installation Process
Step 1 - First, make sure the electricity is turned off, and check it with a circuit tester.
Step 2 - Select a location unobstructed by ceiling joists (use a stud finder to make sure) or other impediments. Some heavier new construction fixtures need to be attached to joists or onto hanging bars; follow the manufacturer’s instructions in this case.
Step 3 - Use the supplied template to trace the fixture’s outline on the ceiling. Cut the hole precisely, using a drywall saw or a hole-cutting saw.
Step 4 - Run new cable from the power source and the switch box to the new hole. If installing into an attic space, this part is fairly easy. If installing between stories, you will have to fish the wire through the walls and ceiling. Be sure to allow about one and a half feet of extra cable length to hang from the hole. Wire the new fixture’s junction box to the cable. Wire all black wires together, all white wires together, and all ground wires together. Use wiring connectors to cap the connections.
Step 5 - Insert the outer housing (called the “can”) into the hole and secure according to the manufacturer’s instructions. Most remodel types have clips inside the can which bend in to hold the housing above the ceiling drywall.
Step 6 - Insert the body of the light and the trim, and screw in the light bulb. Repeat these steps for each fixture. After all the fixtures are installed, restore power and test out your new recessed lighting system.
View All Comments /Add Comment